CenturyLink Fiber on pfSense
This write up explains how to configure pfSense (2.4.5-RC at the time of this writing) for CenturyLink Fiber in US/Colorado market, including IPv6 via 6rd. Bonus setup for Pi-Hole.
pfSense
Since I got CenturyLink fiber back in August 2019, I was using a UniFi USG-4 Pro (USG4) router/gateway. I upgraded to the new UniFi Dream Machine Pro (UDMP) and it was a disaster. So many things did not work, weren't implemented, or just plain broken. Ubiquiti's UniFi line of router/gateways should be avoided.
So after going through two weekends of trying to get the UDMP working, I decided to build myself a custom pfSense box.
Chassis: SuperServer 1019C-FHTN8
CPU: i3-9100
Memory: 32 GB of DDR4 2666Mhz Unbuffered ECC (16GB x2)
Drives: Samsung 970 EVO Plus 250GB m.2 NVMe SSD (x2)
Network: Intel I210 1-GbE built-in port for fiber ONT connection
Network: Intel 10-GbE SFP+ PCIe card to LAN connection to UniFi 16XG switch
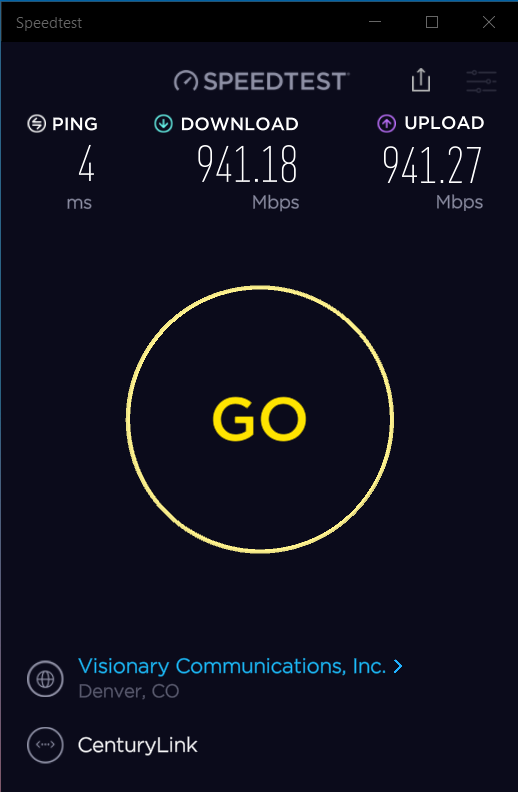
I installed pfSense 2.4.5-RC, using ZFS root, mirroring the m.2 drives.
CenturyLink Setup
In order to use your own router with CenturyLink Fiber, but sure to ask your installer for the PPPoE credentials when they come to install the fiber line and ONT at your house.
WAN Interface
CenturyLink WAN interface has 3 major components
- PPPoE authenication
- VLAN 201
- 6rd for IPv6
CenturyLink requires setting up your internet with a VLAN, specifically VLAN 201. If you get TV service from them, you can get TV using the same physical fiber, it just comes on another VLAN.
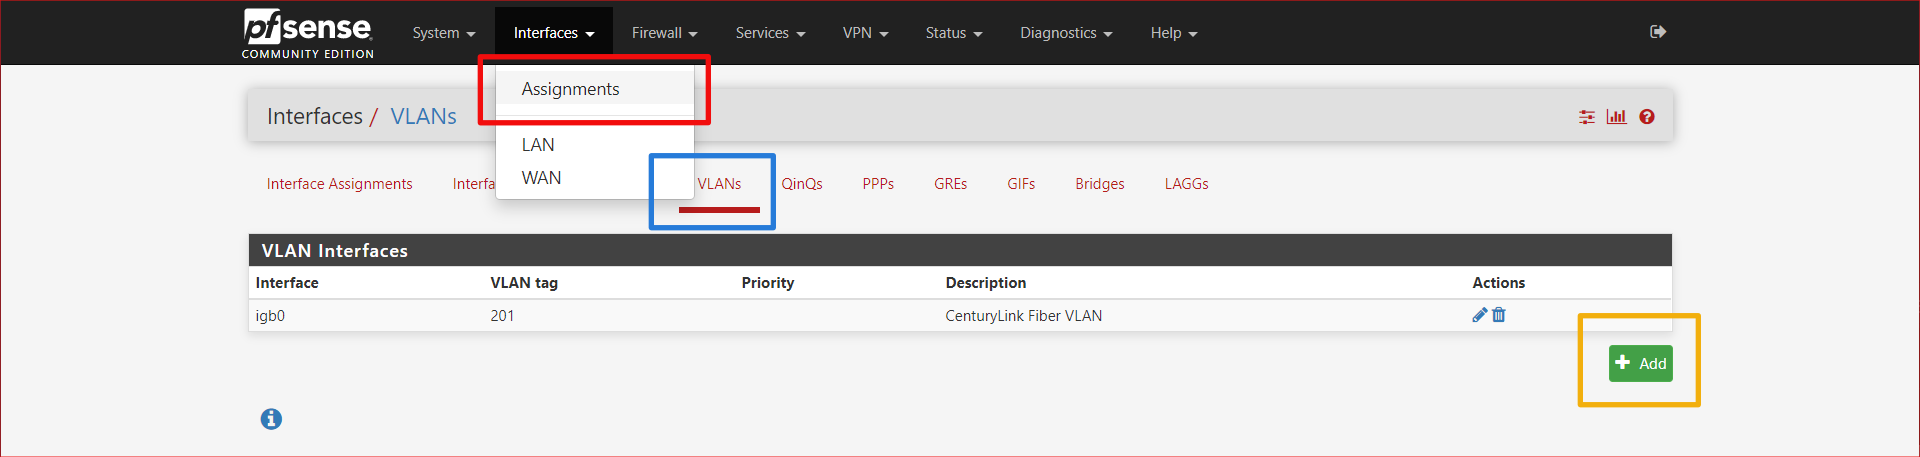
Go to Interfaces > Assignments then click on the VLANs tab, then the + Add button.
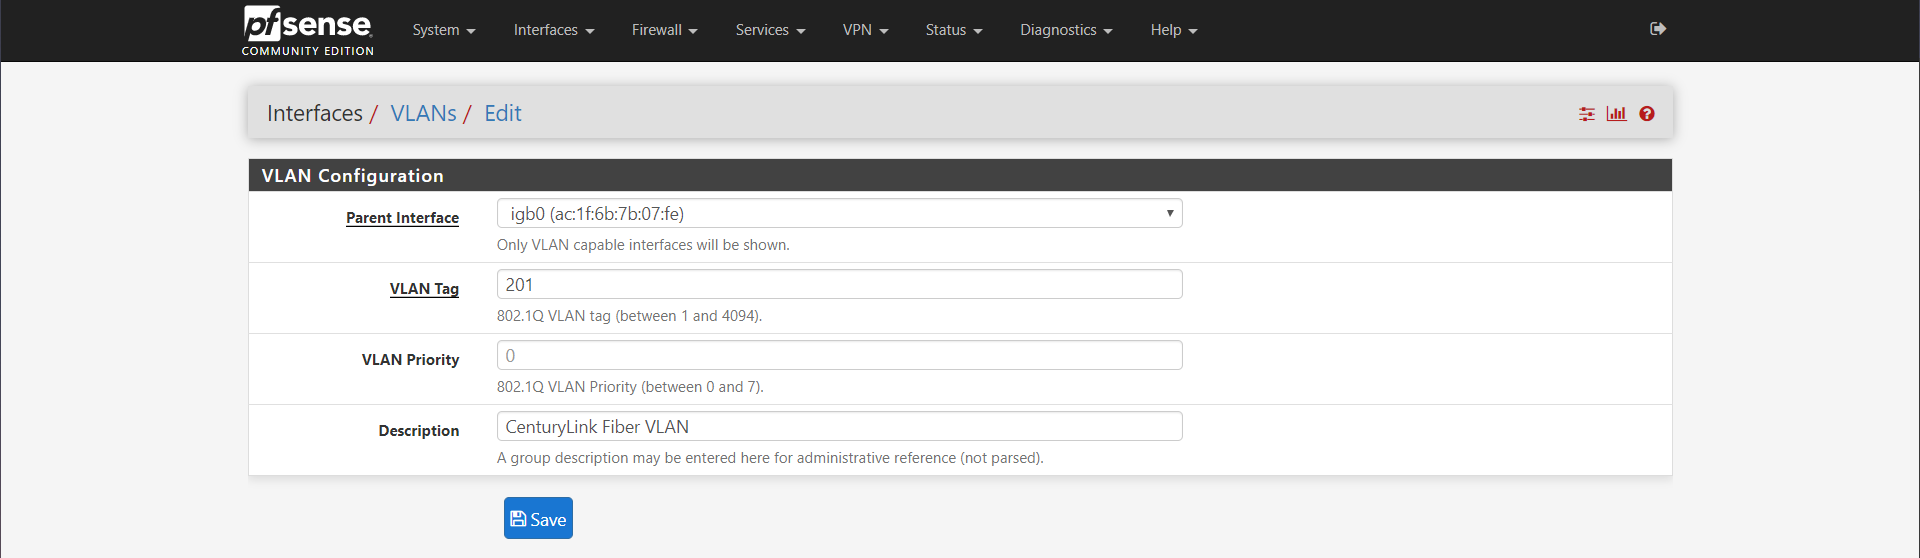
Choose your interface that you have plugged the ethernet cable from the ONT into your pfSense router. In my case, this was igb0. Set the VLAN Tag to 201. Enter a decription if you'd like and press save.

Now go to Interfaces > WAN

General Configuration
IPv4 Configuration Type: PPPoE
IPv6 Configuration Type: 6rd Tunnel
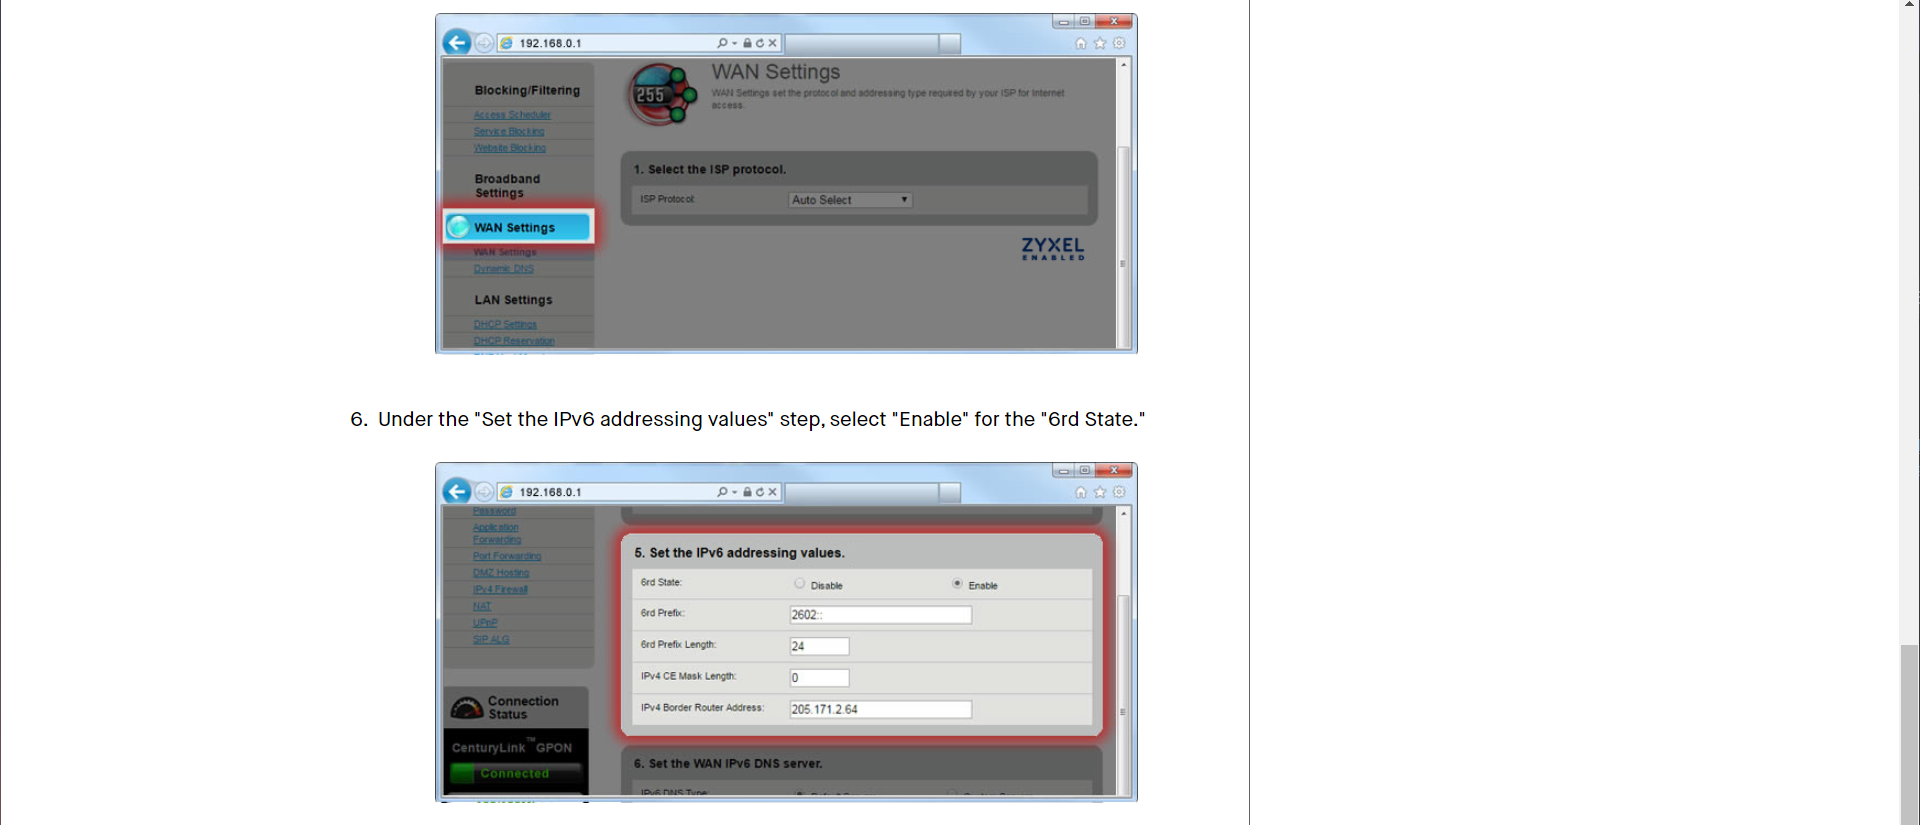
6rd Configuration
6rd Prefix: 2602::/24
6RD Border relay: 205.171.2.64
6RD IPv4 Prefix Length: 0
PPPoE Configuration
Username: ******@centurylink.net (sometimes @qwest.net?)
Password: ******
The 6rd configuration I got from the CenturyLink documentation for my router online. I found my modem model at https://www.centurylink.com/home/help/internet/modems-and-routers.html and went to IPv6 section. My model was a ZyXEL C3000Z.
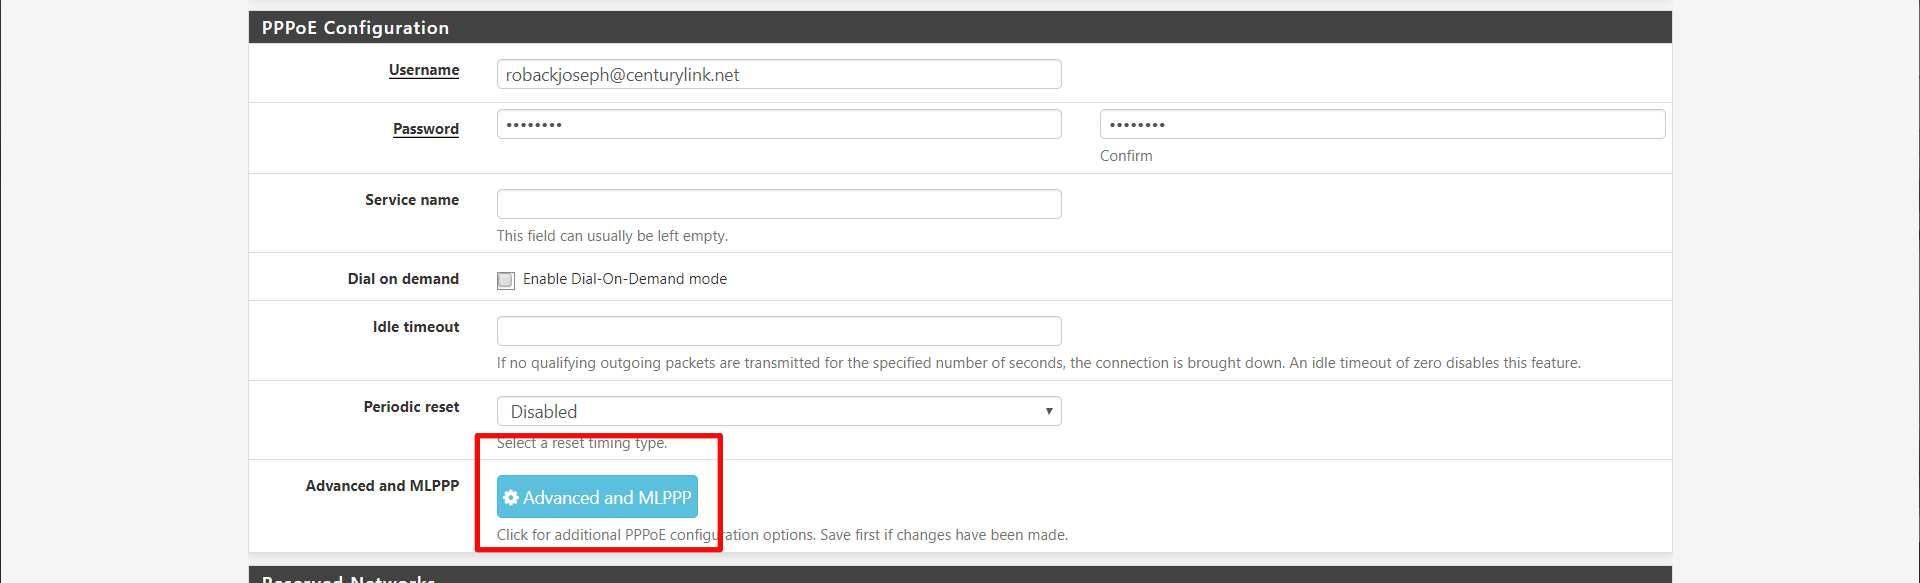
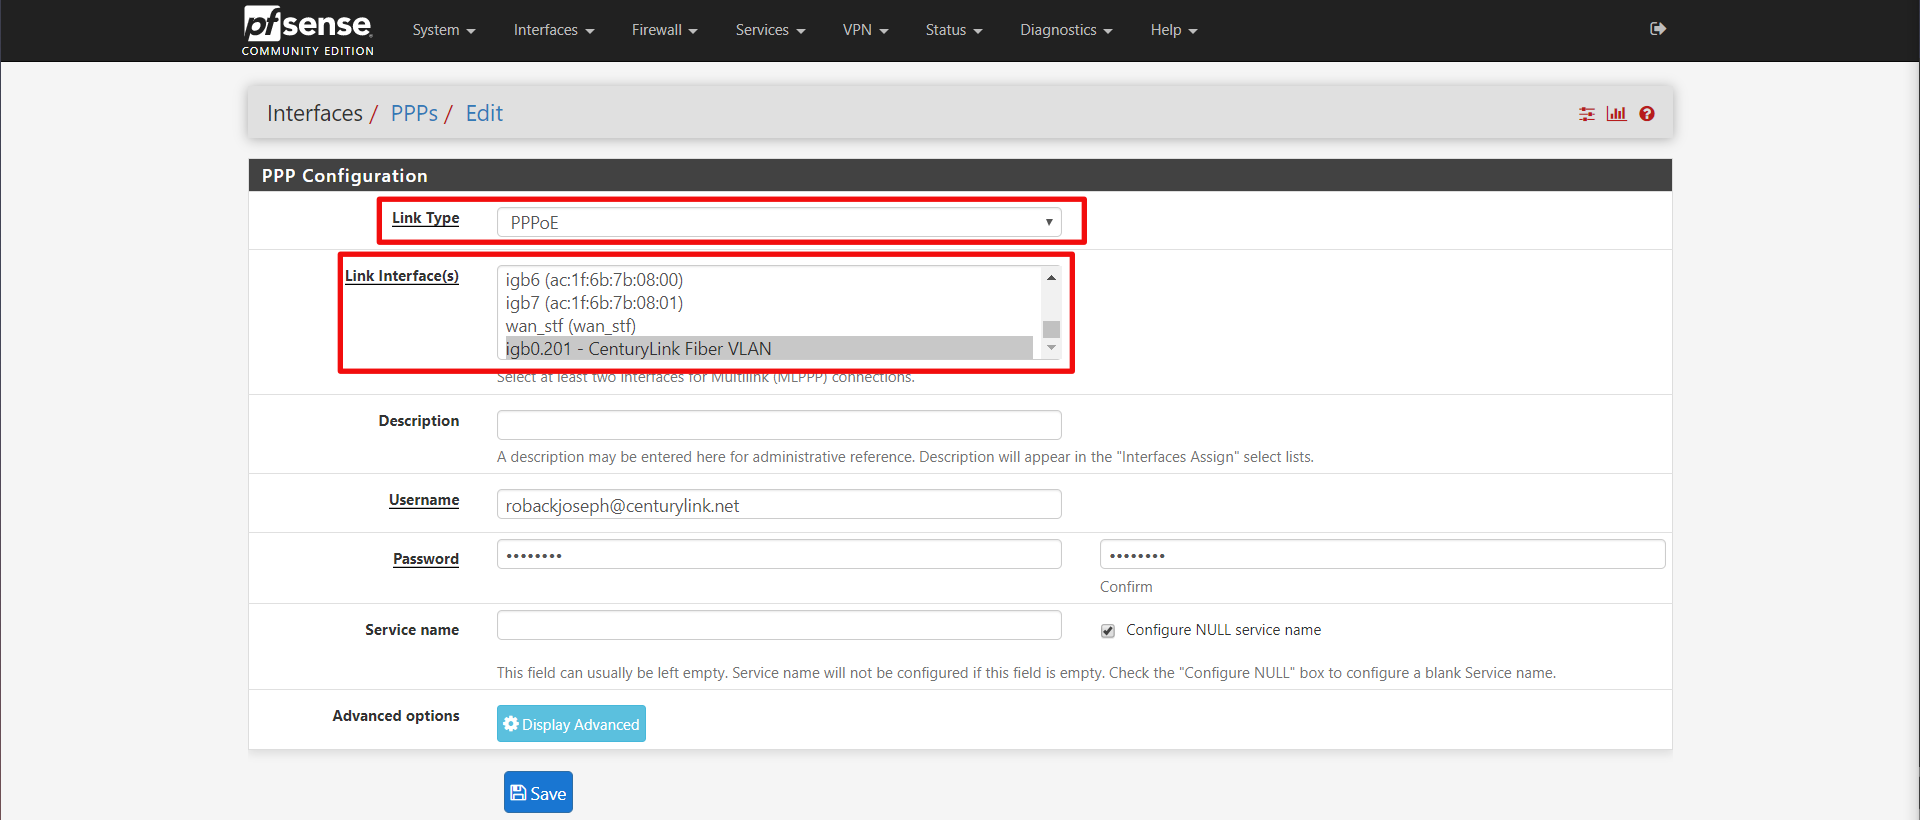
But wait! There is one more step. We need to associate that VLAN Tag 201 with our PPPoE interface. Click on Advanced and MLPPP button in the PPPoE Configuration section.
Then link the PPPoE interface with the VLAN interface we made earlier.
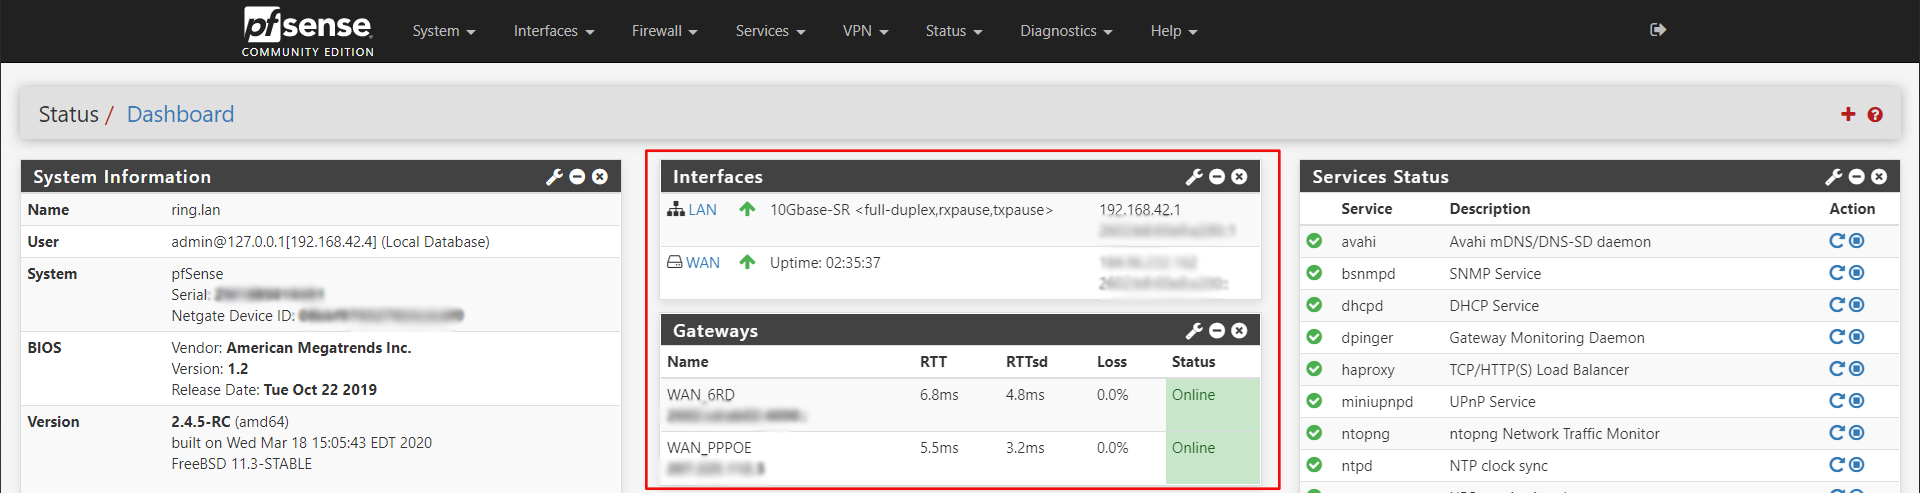
Now click save. When you go back to the pfSense summary page, you should see your WAN interface up.
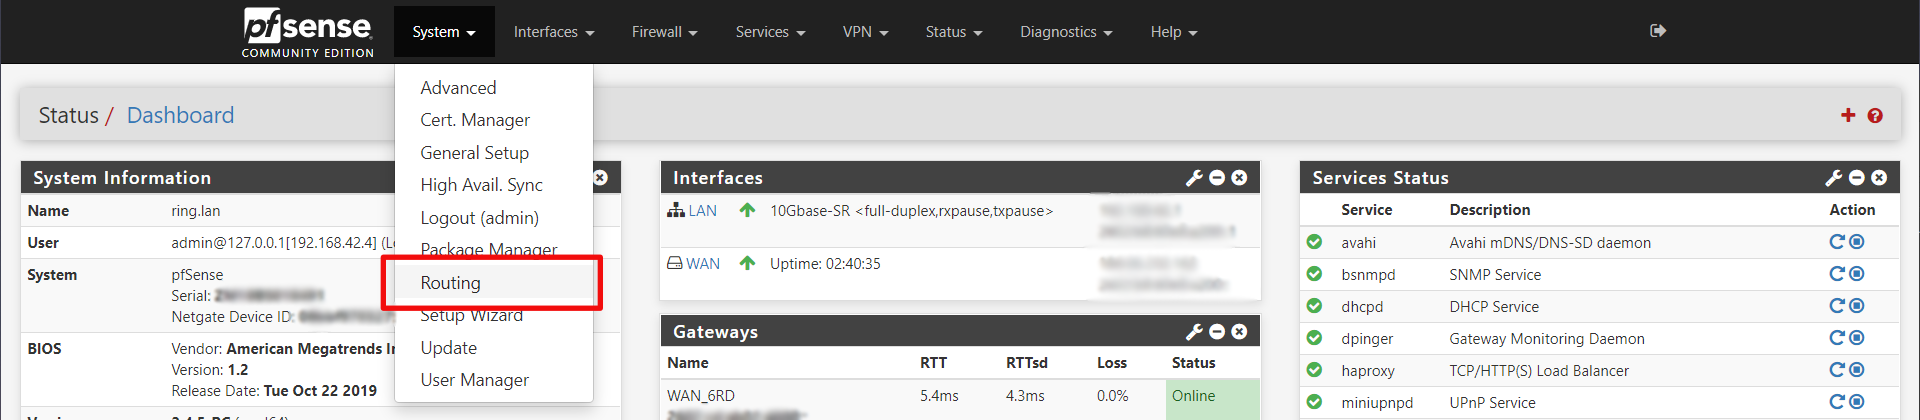
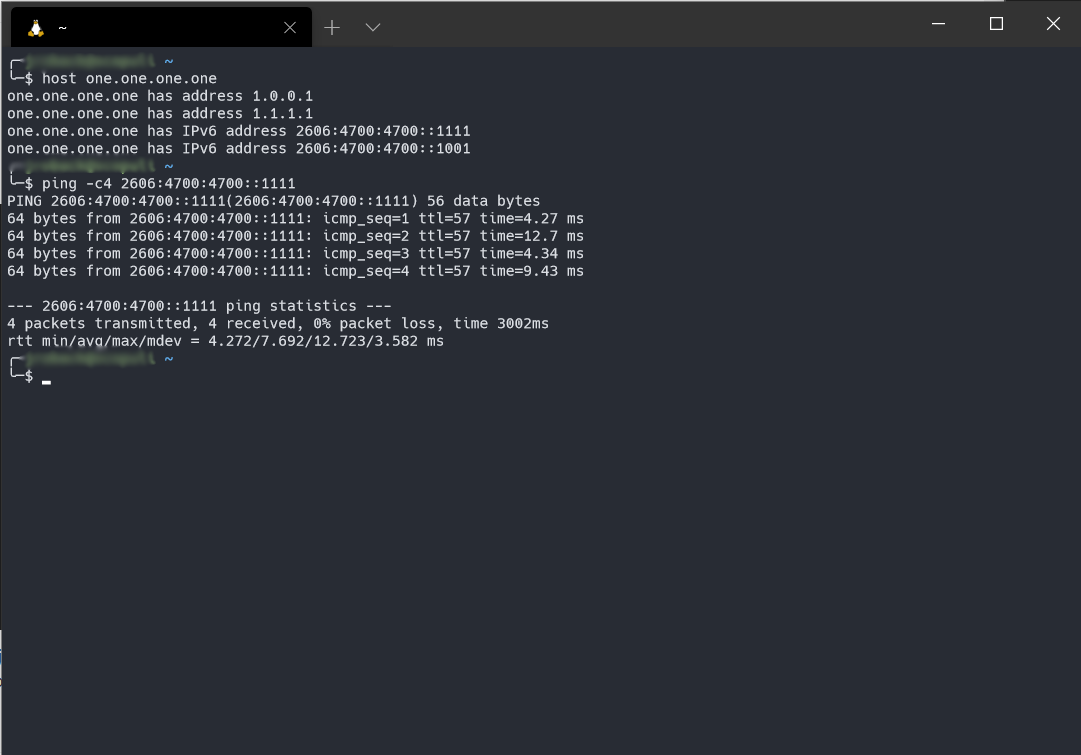
Initially for me, my WAN_6RD gateway was showing as offline when basic IPv6 traffic from the pfSense console was working. So I went into the routing configuration and adjusted the gateway monitor to explicitly use the CloudFlare servers.
Then edit the WAN_6RD gateway and set the Monitor IP. I choose CloudFlare's 1.1.1.1 DNS server in IPv6: 2606:4700:4700::1111.
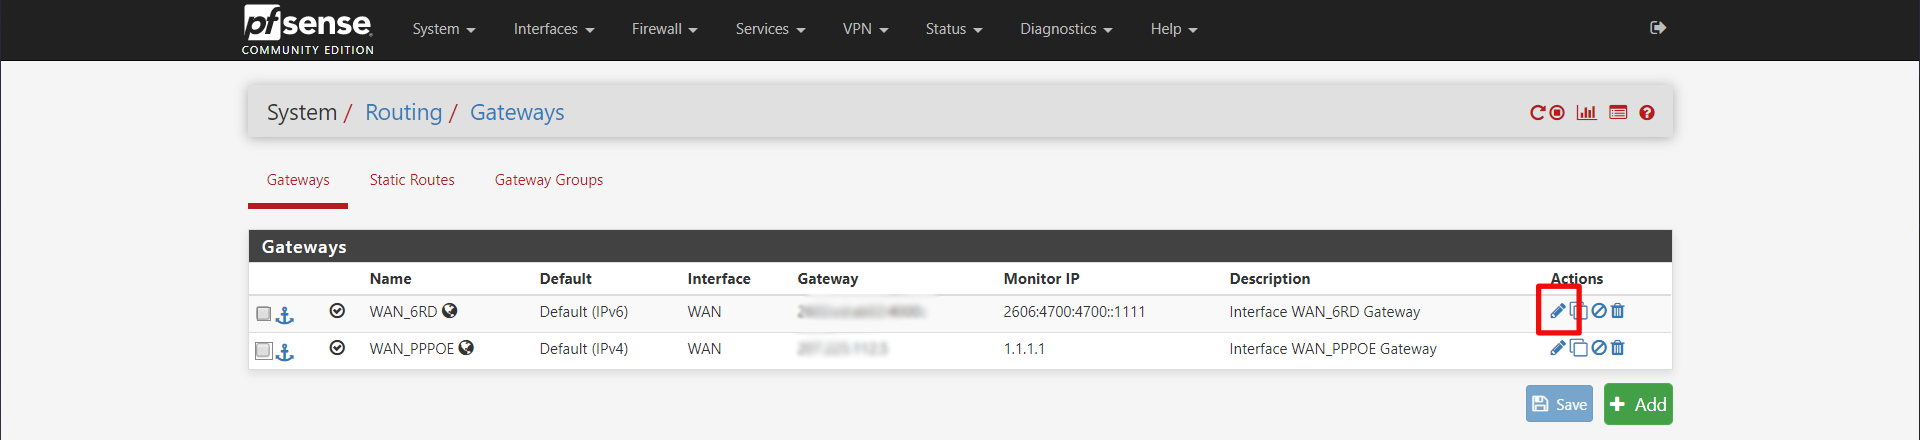
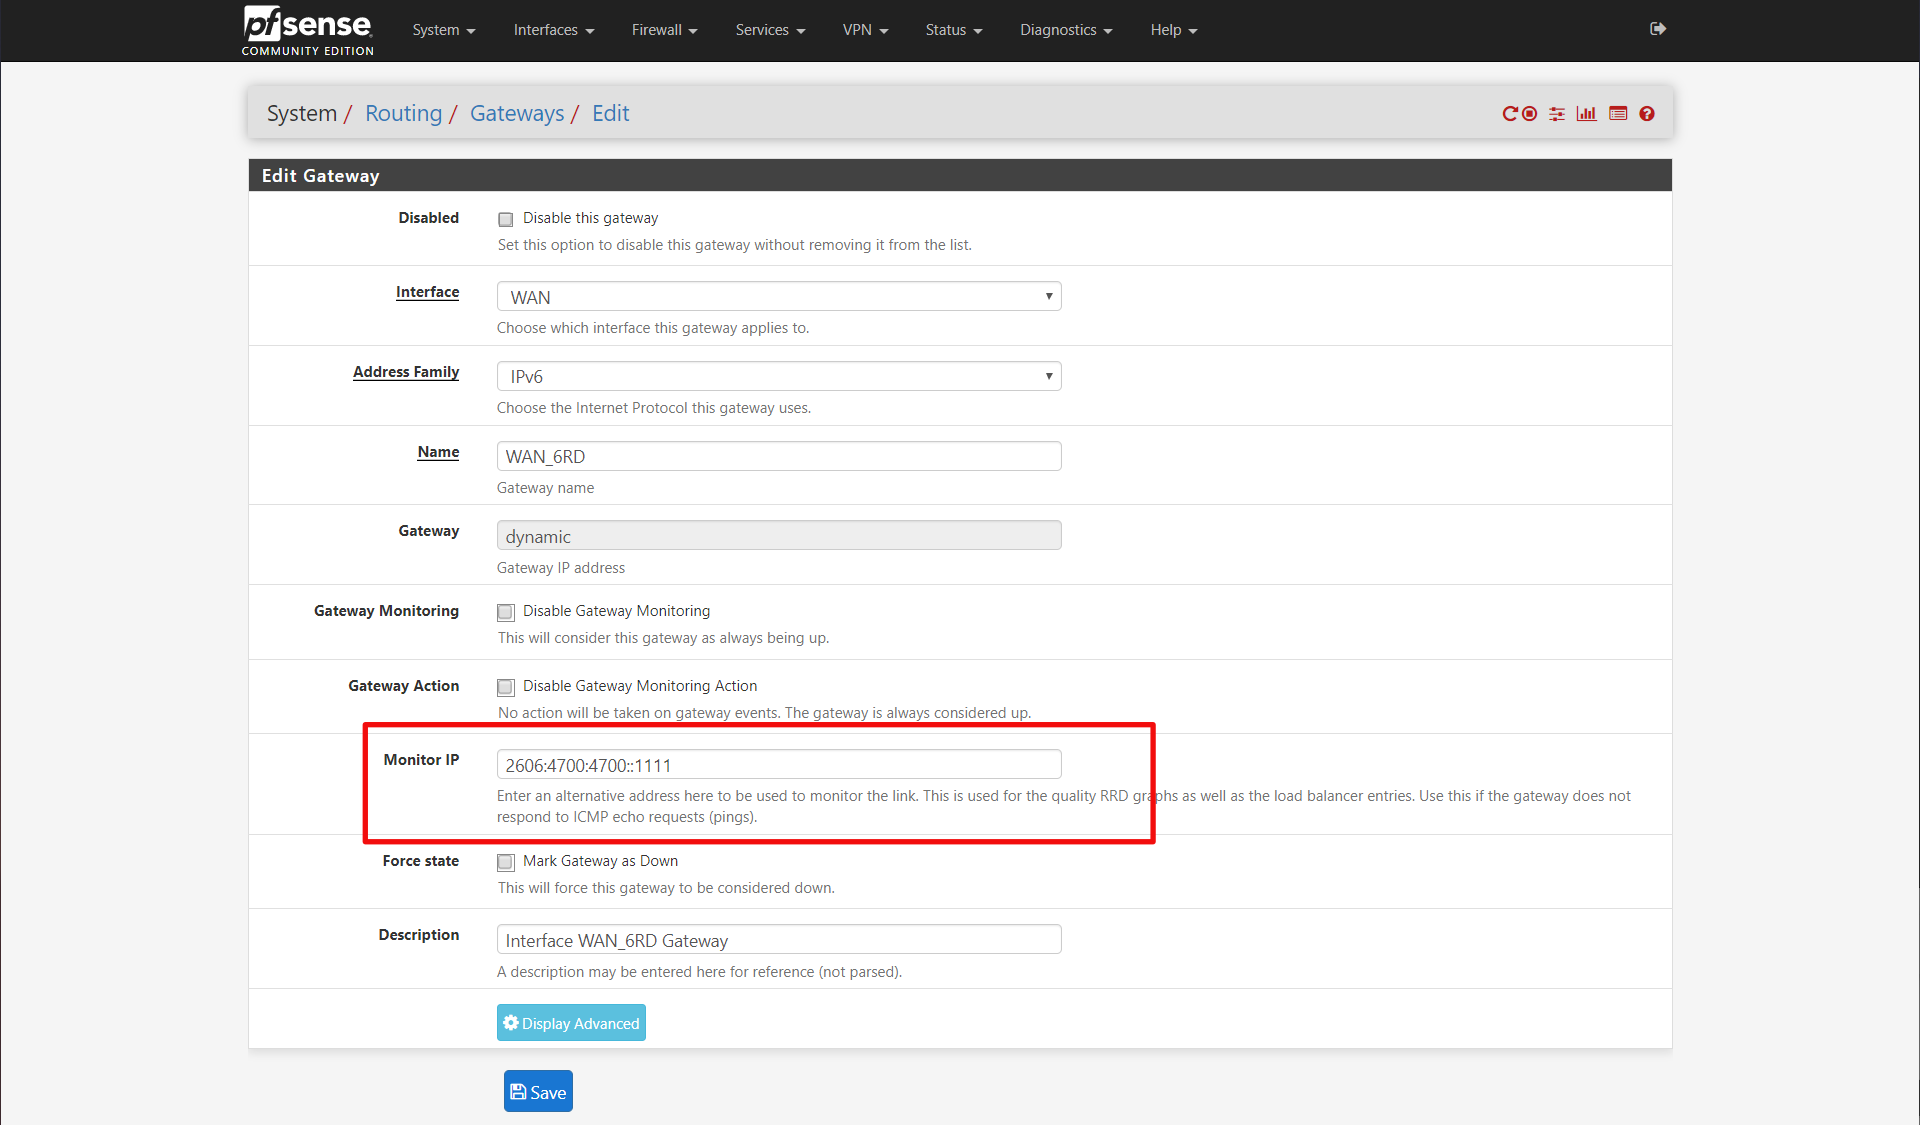
Click save and your gateway status on the summary page should be green now, if IPv6 is working for you. I also changed my IPv4 WAN_PPPOE gateway to monitor 1.1.1.1 as well.
LAN Interface
The last thing we need to do to setup IPv6 is configure the LAN interface. Start by going to Interfaces > LAN.
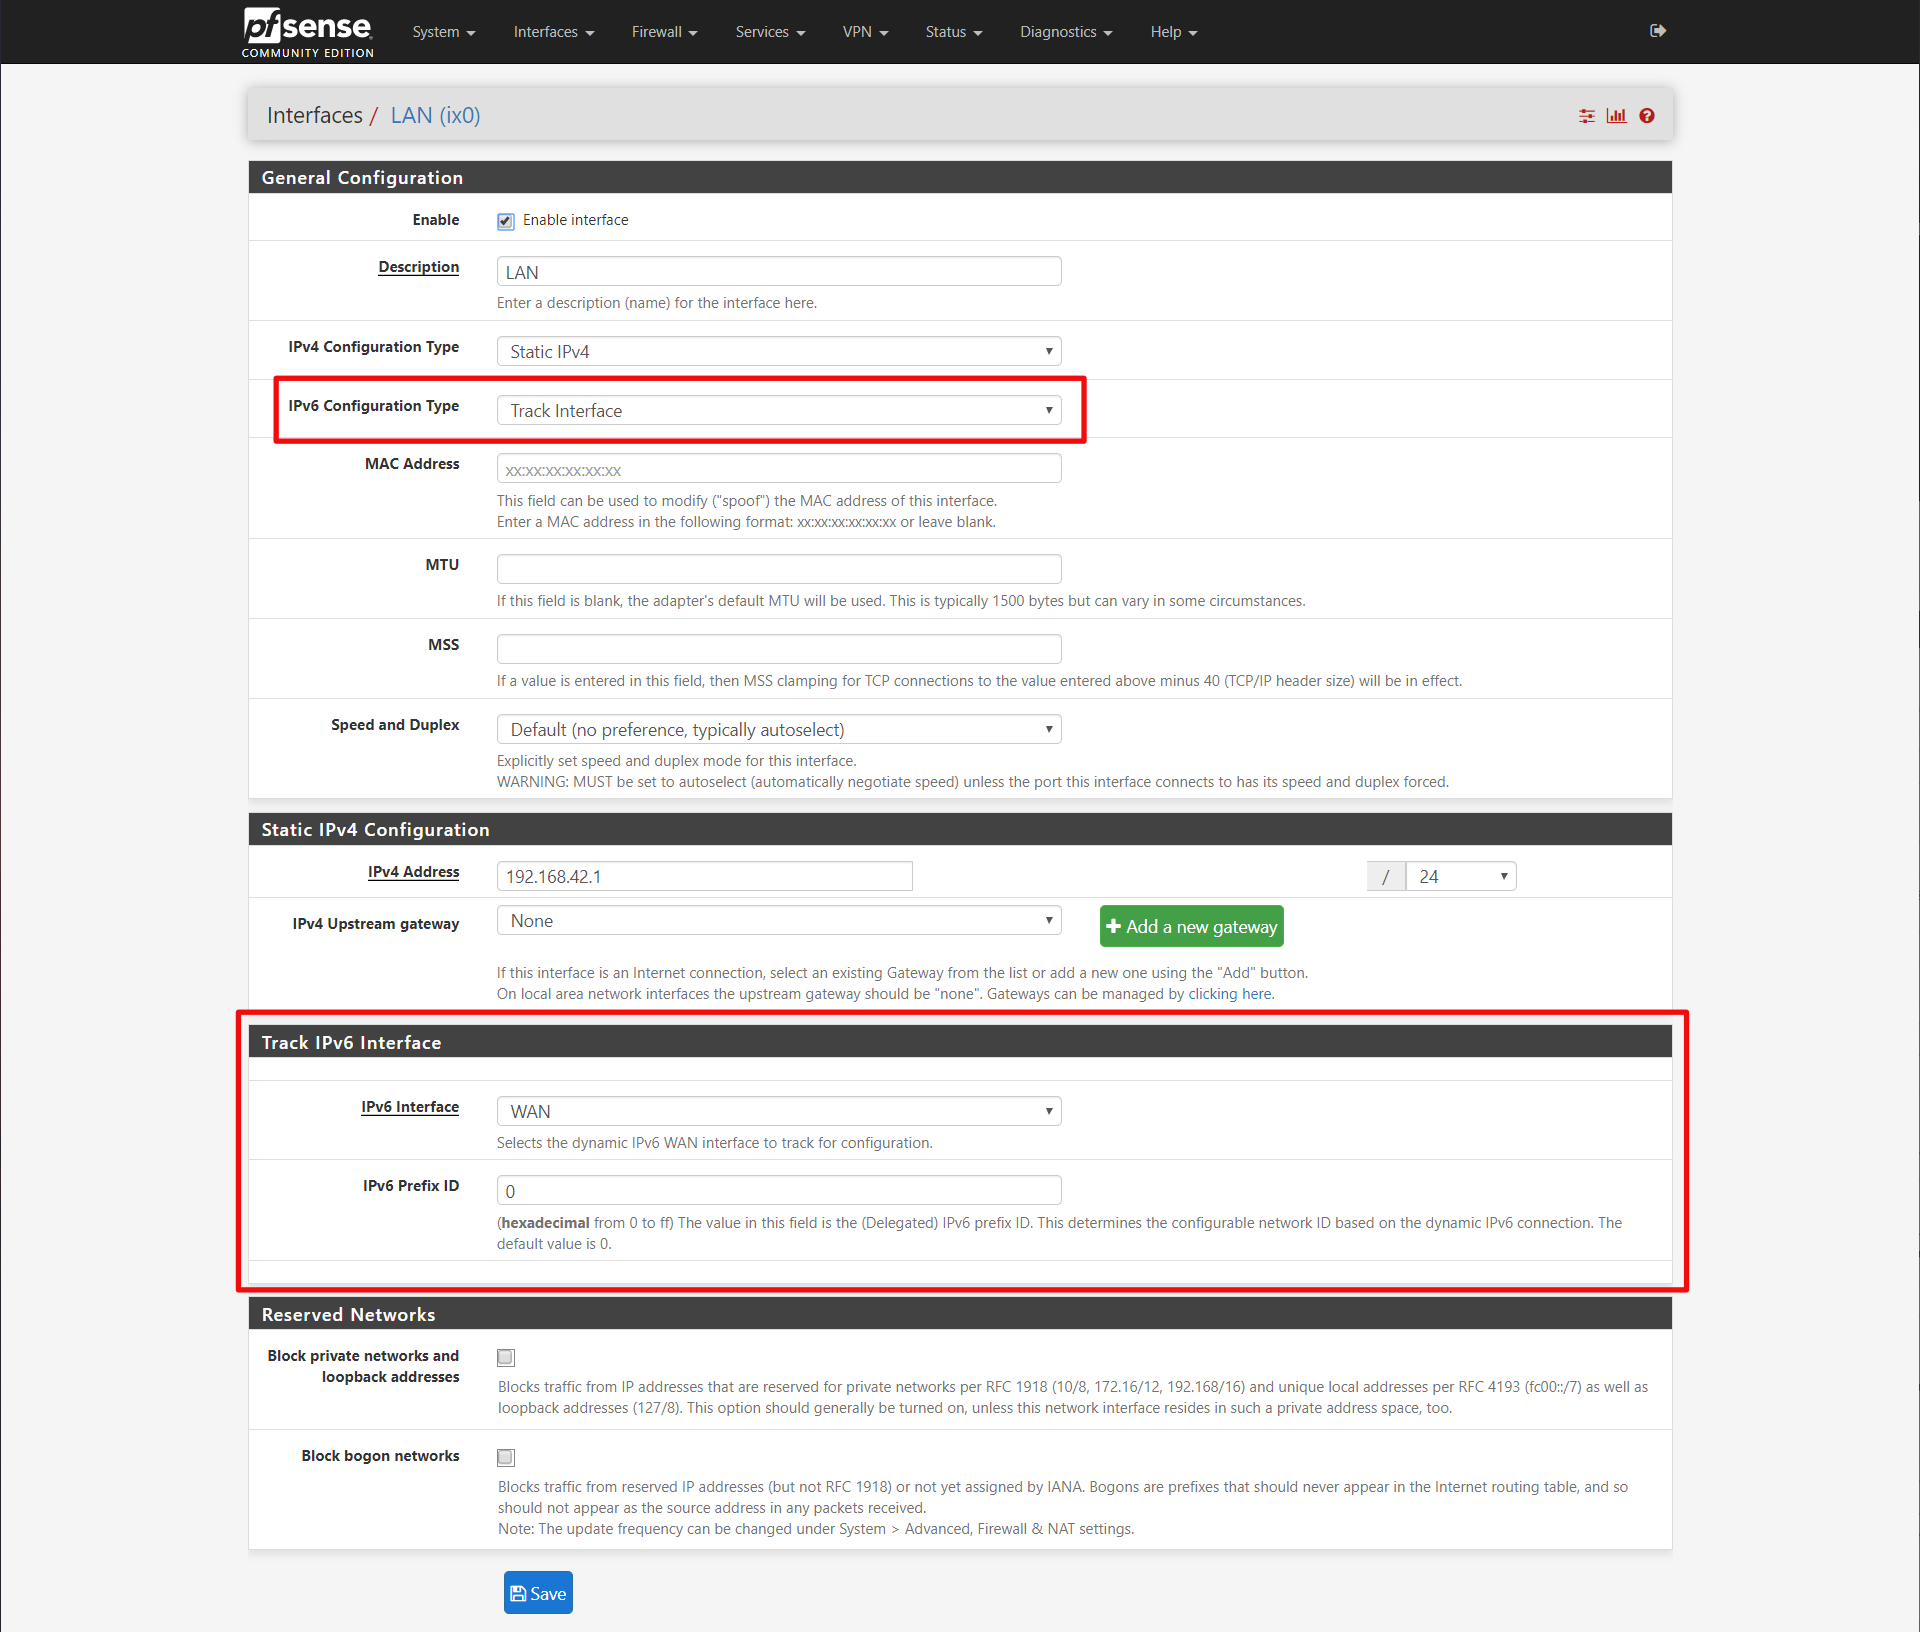
General Configuration
IPv6 Configuration Type: Track Interface
Track IPv6 Interface
IPv6 Interface: WAN
IPv6 PRefix ID: 0
Now click save. Finally we need to configure the router advertisment daemon so the IPv6 hosts on the LAN will get IPv6 prefix and DNS server.
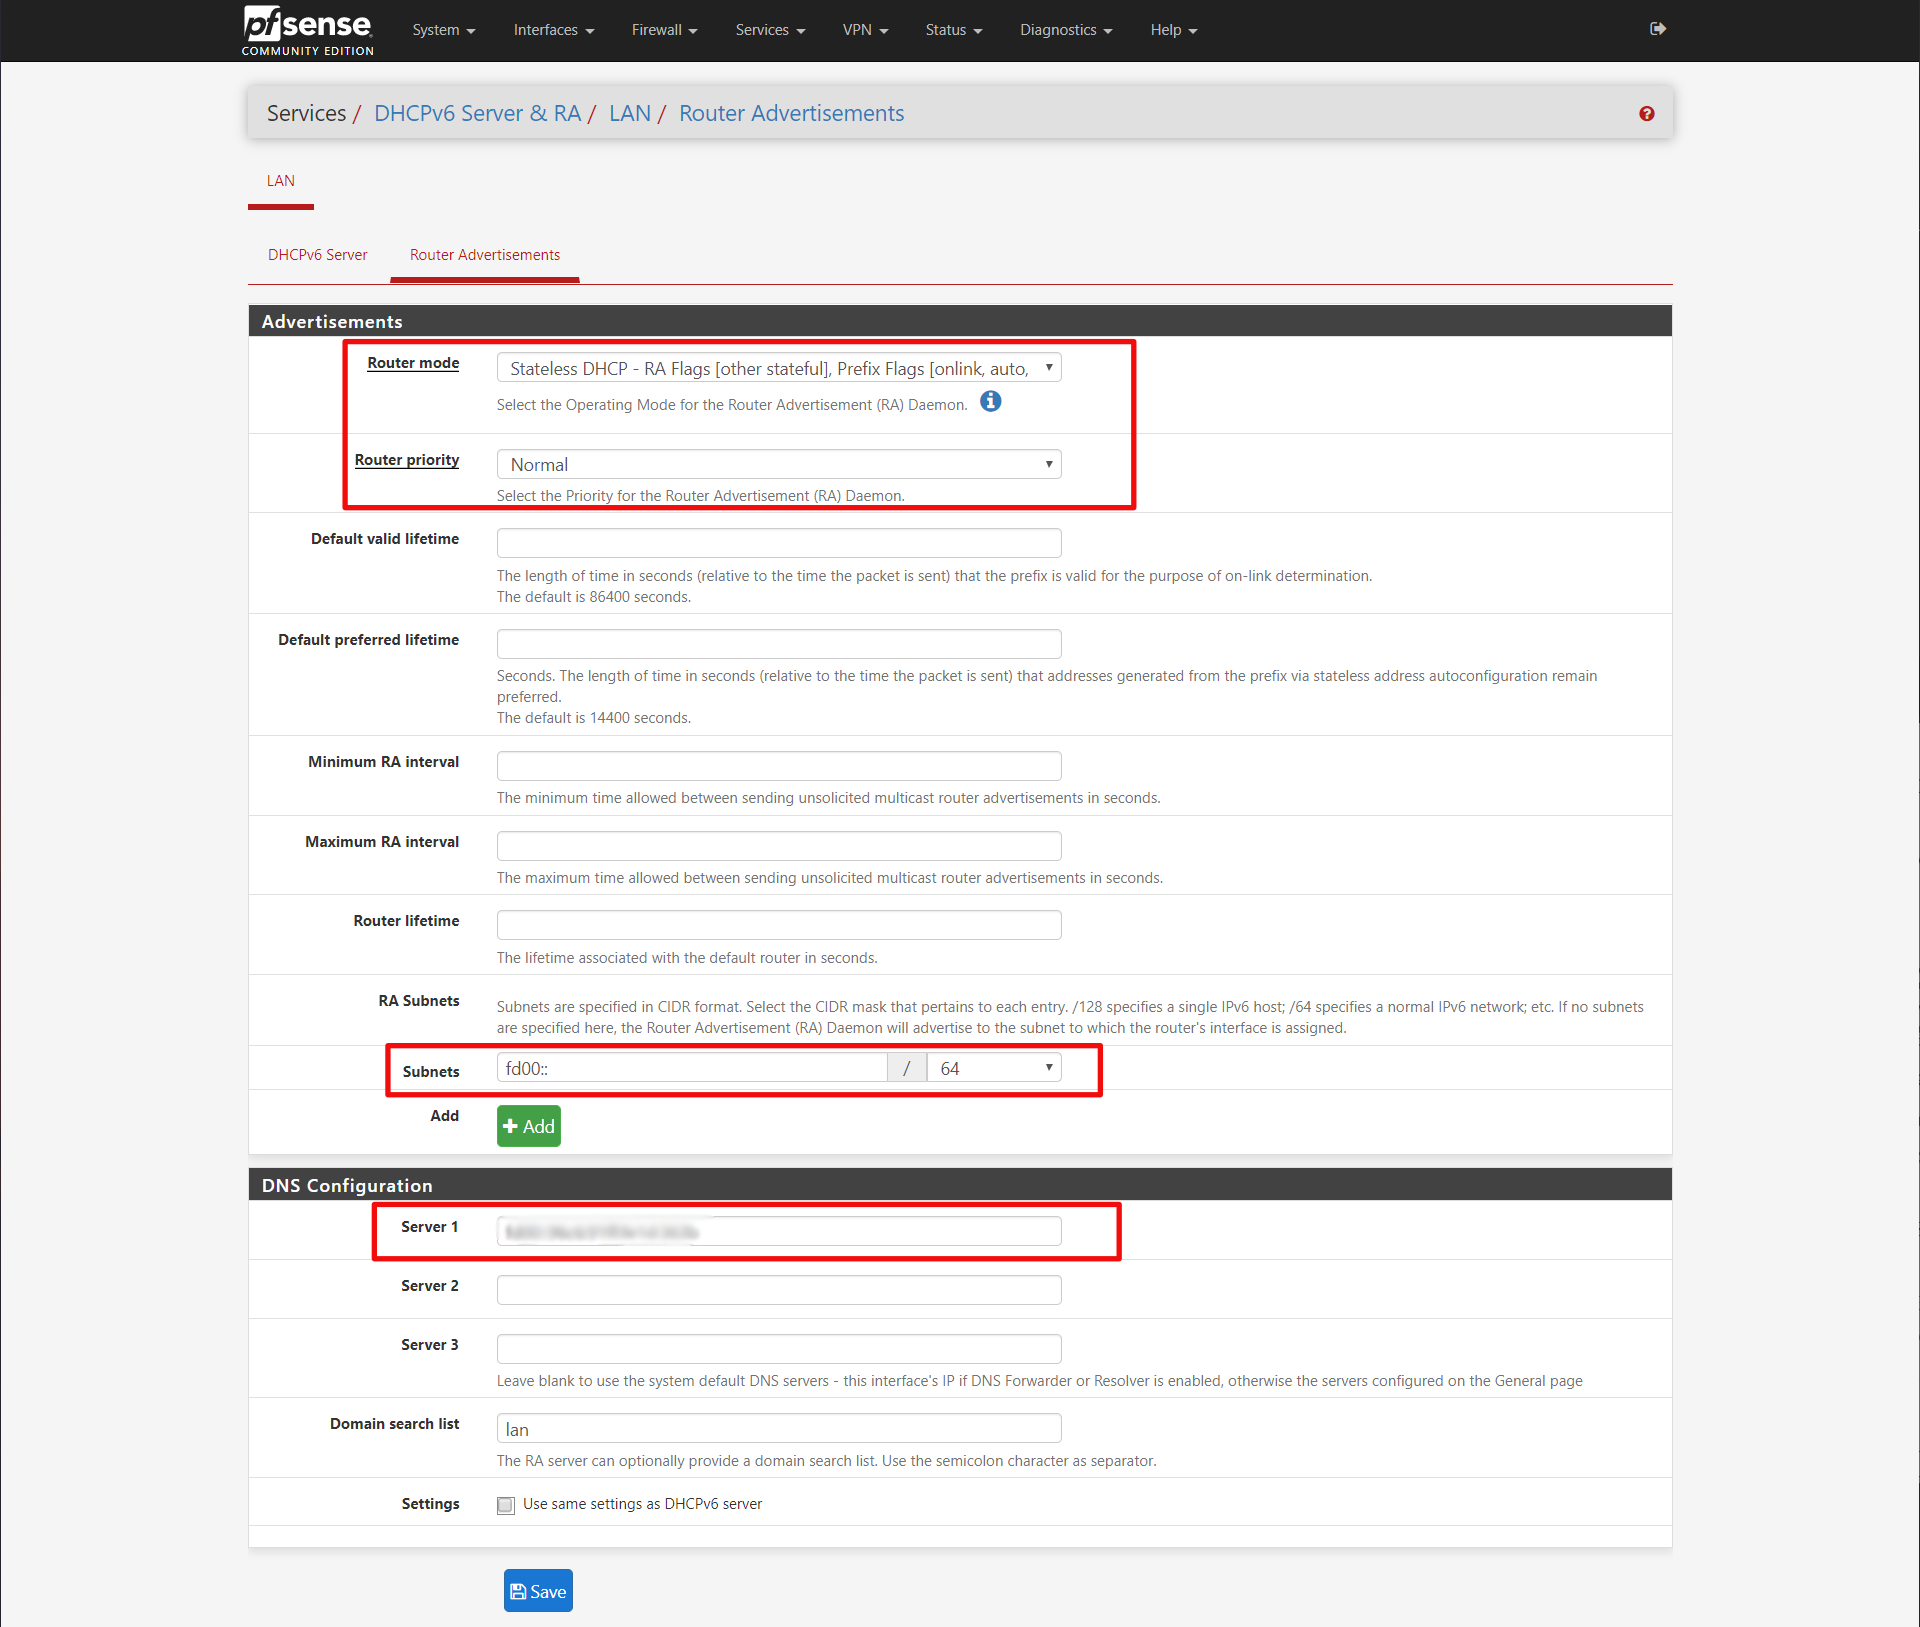
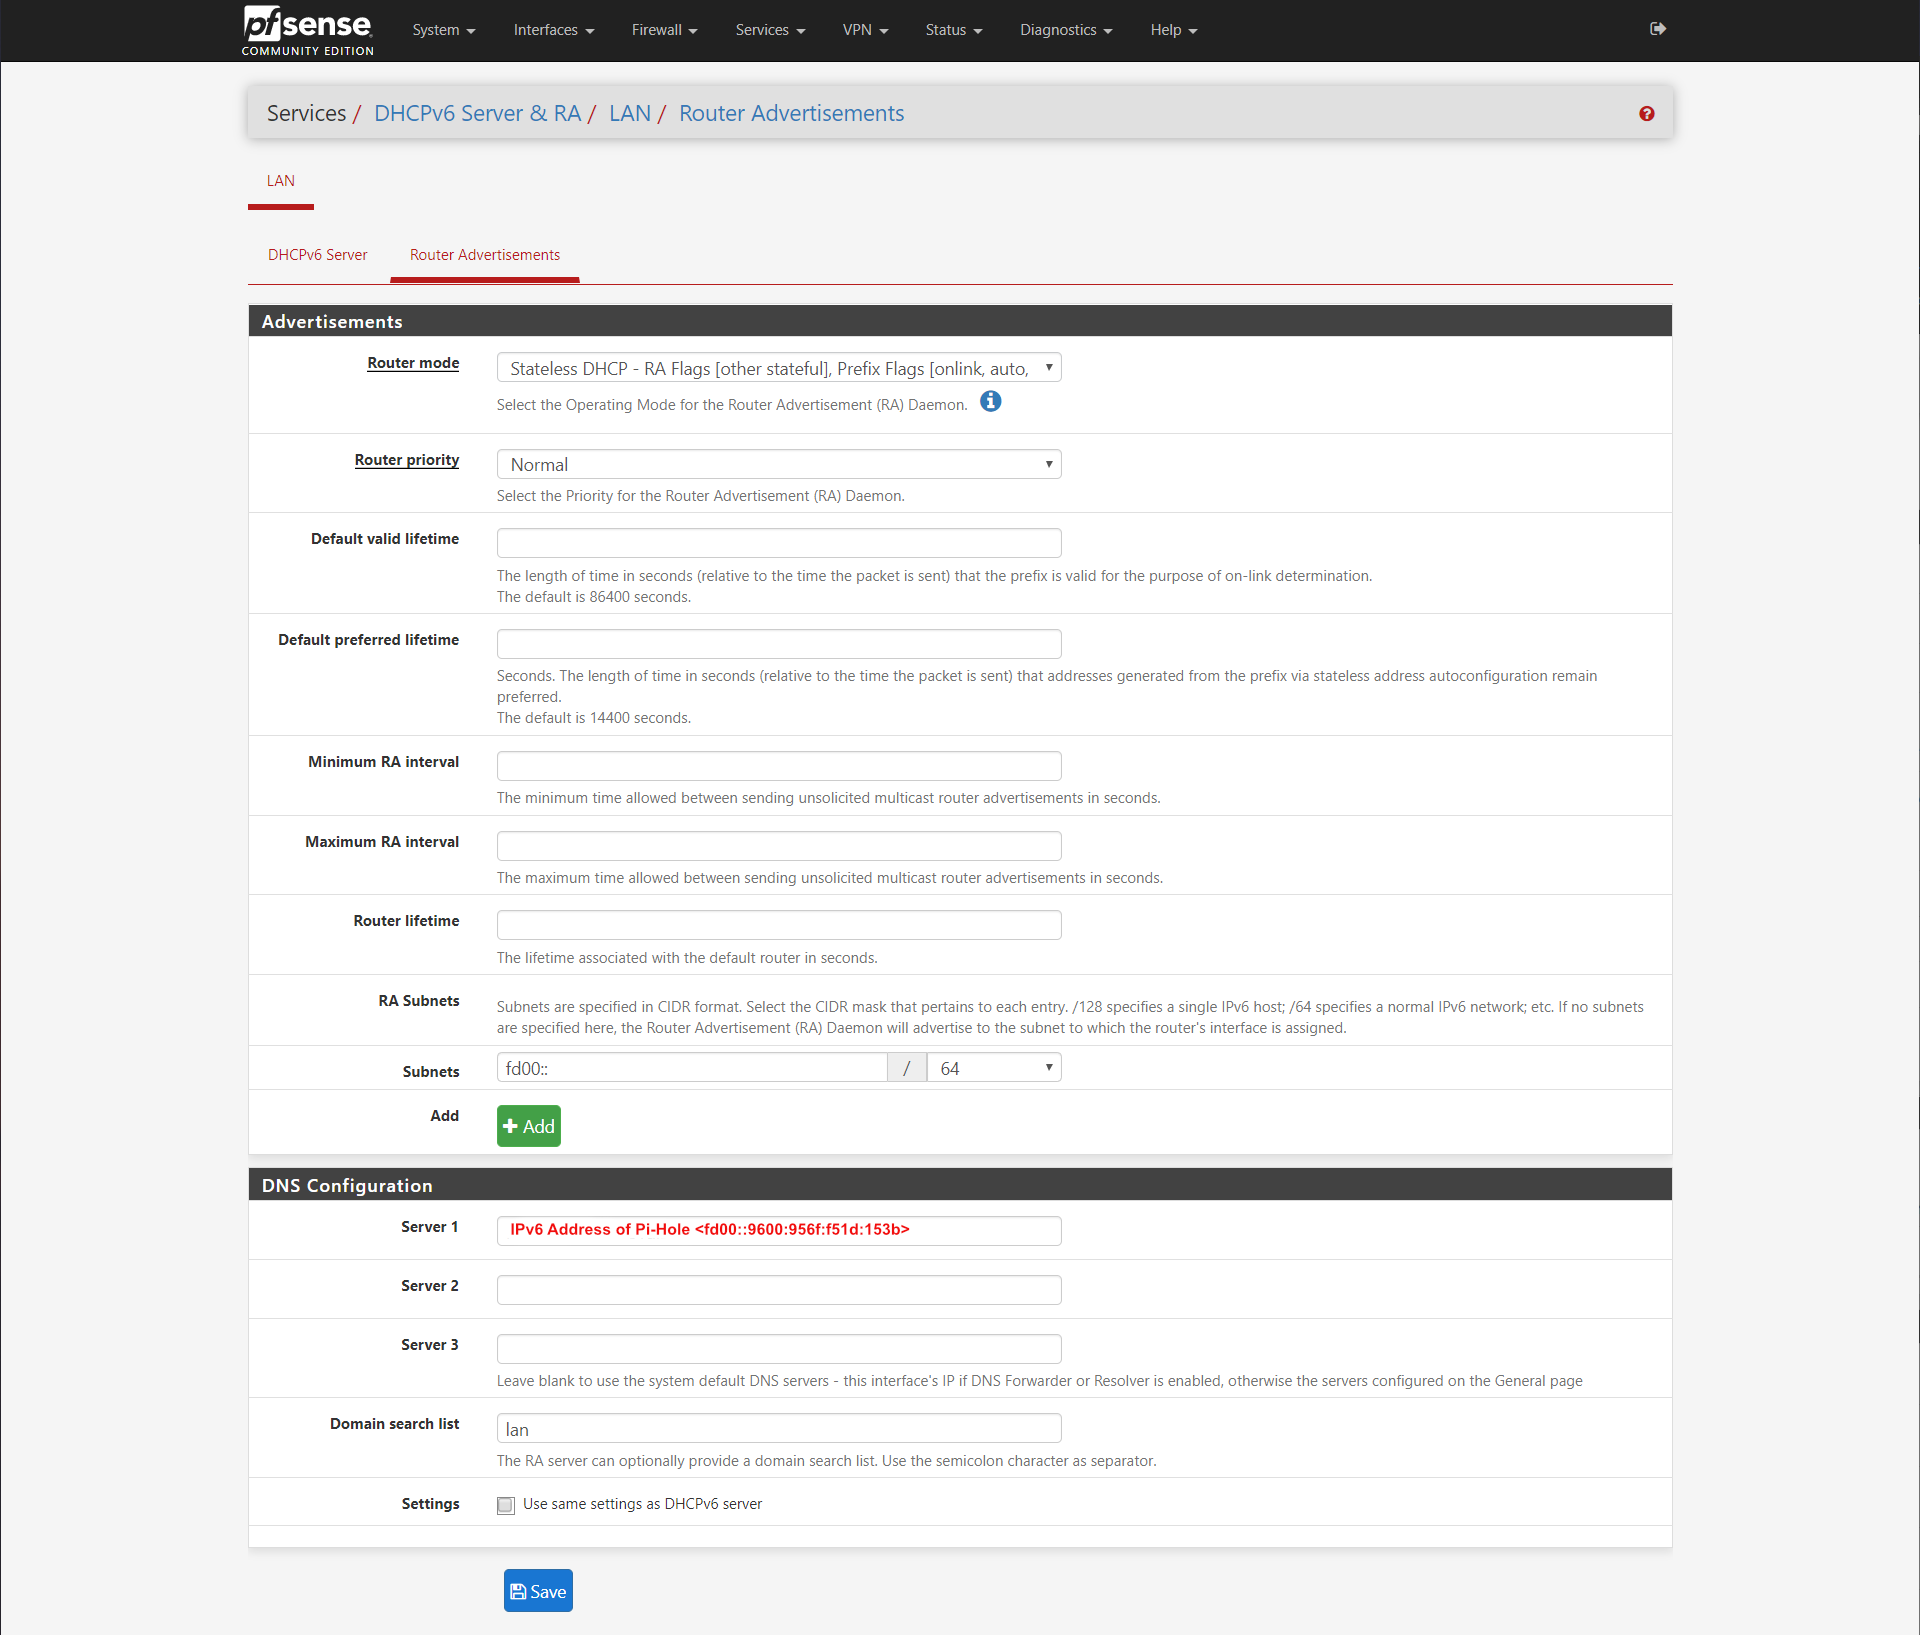
Advertisements
Router Mode: Stateless DHCP
Router priority: Normal
Subnets: ff00::/64
DNS Configuration
Server 1: <leave blank for pfSense DNS resolver>
Later we will fill in the DNS server IPv6 address of our Pi-Hole after that is setup. For the subnets, I got that information again from the CenturyLink modem documentation.
At this point with pfSense, you should have your CenturyLink fiber IPv4 and IPv6 connected and running on pfSense and any LAN devices as well.
If you need your pfSense box to have a fd00:: prefixed IPv6 address on the LAN Net, you have to create a virtual IP for it. I didn't need that, so I left it out of this tutorial for now.
Pi-Hole
I won't go over setting up Pi-Hole, but I will say the reason why I like it over PFBlockerNG (offered by pfSense packages), is that I like that you can install a handy Chrome extension called Remote Switch for Pi-Hole that allows you to toggle blocking on/off when some website you are trying to reach just won't work without ad-blocking disabled.
For the basic setup, let's assume the Pi-Hole has an IPv4 address of 192.168.1.50 and an IPv6 address of fd00::9600:956f:f51d:153b (remember it should start with the IPv6 prefix we configured earlier in the router advertisement)
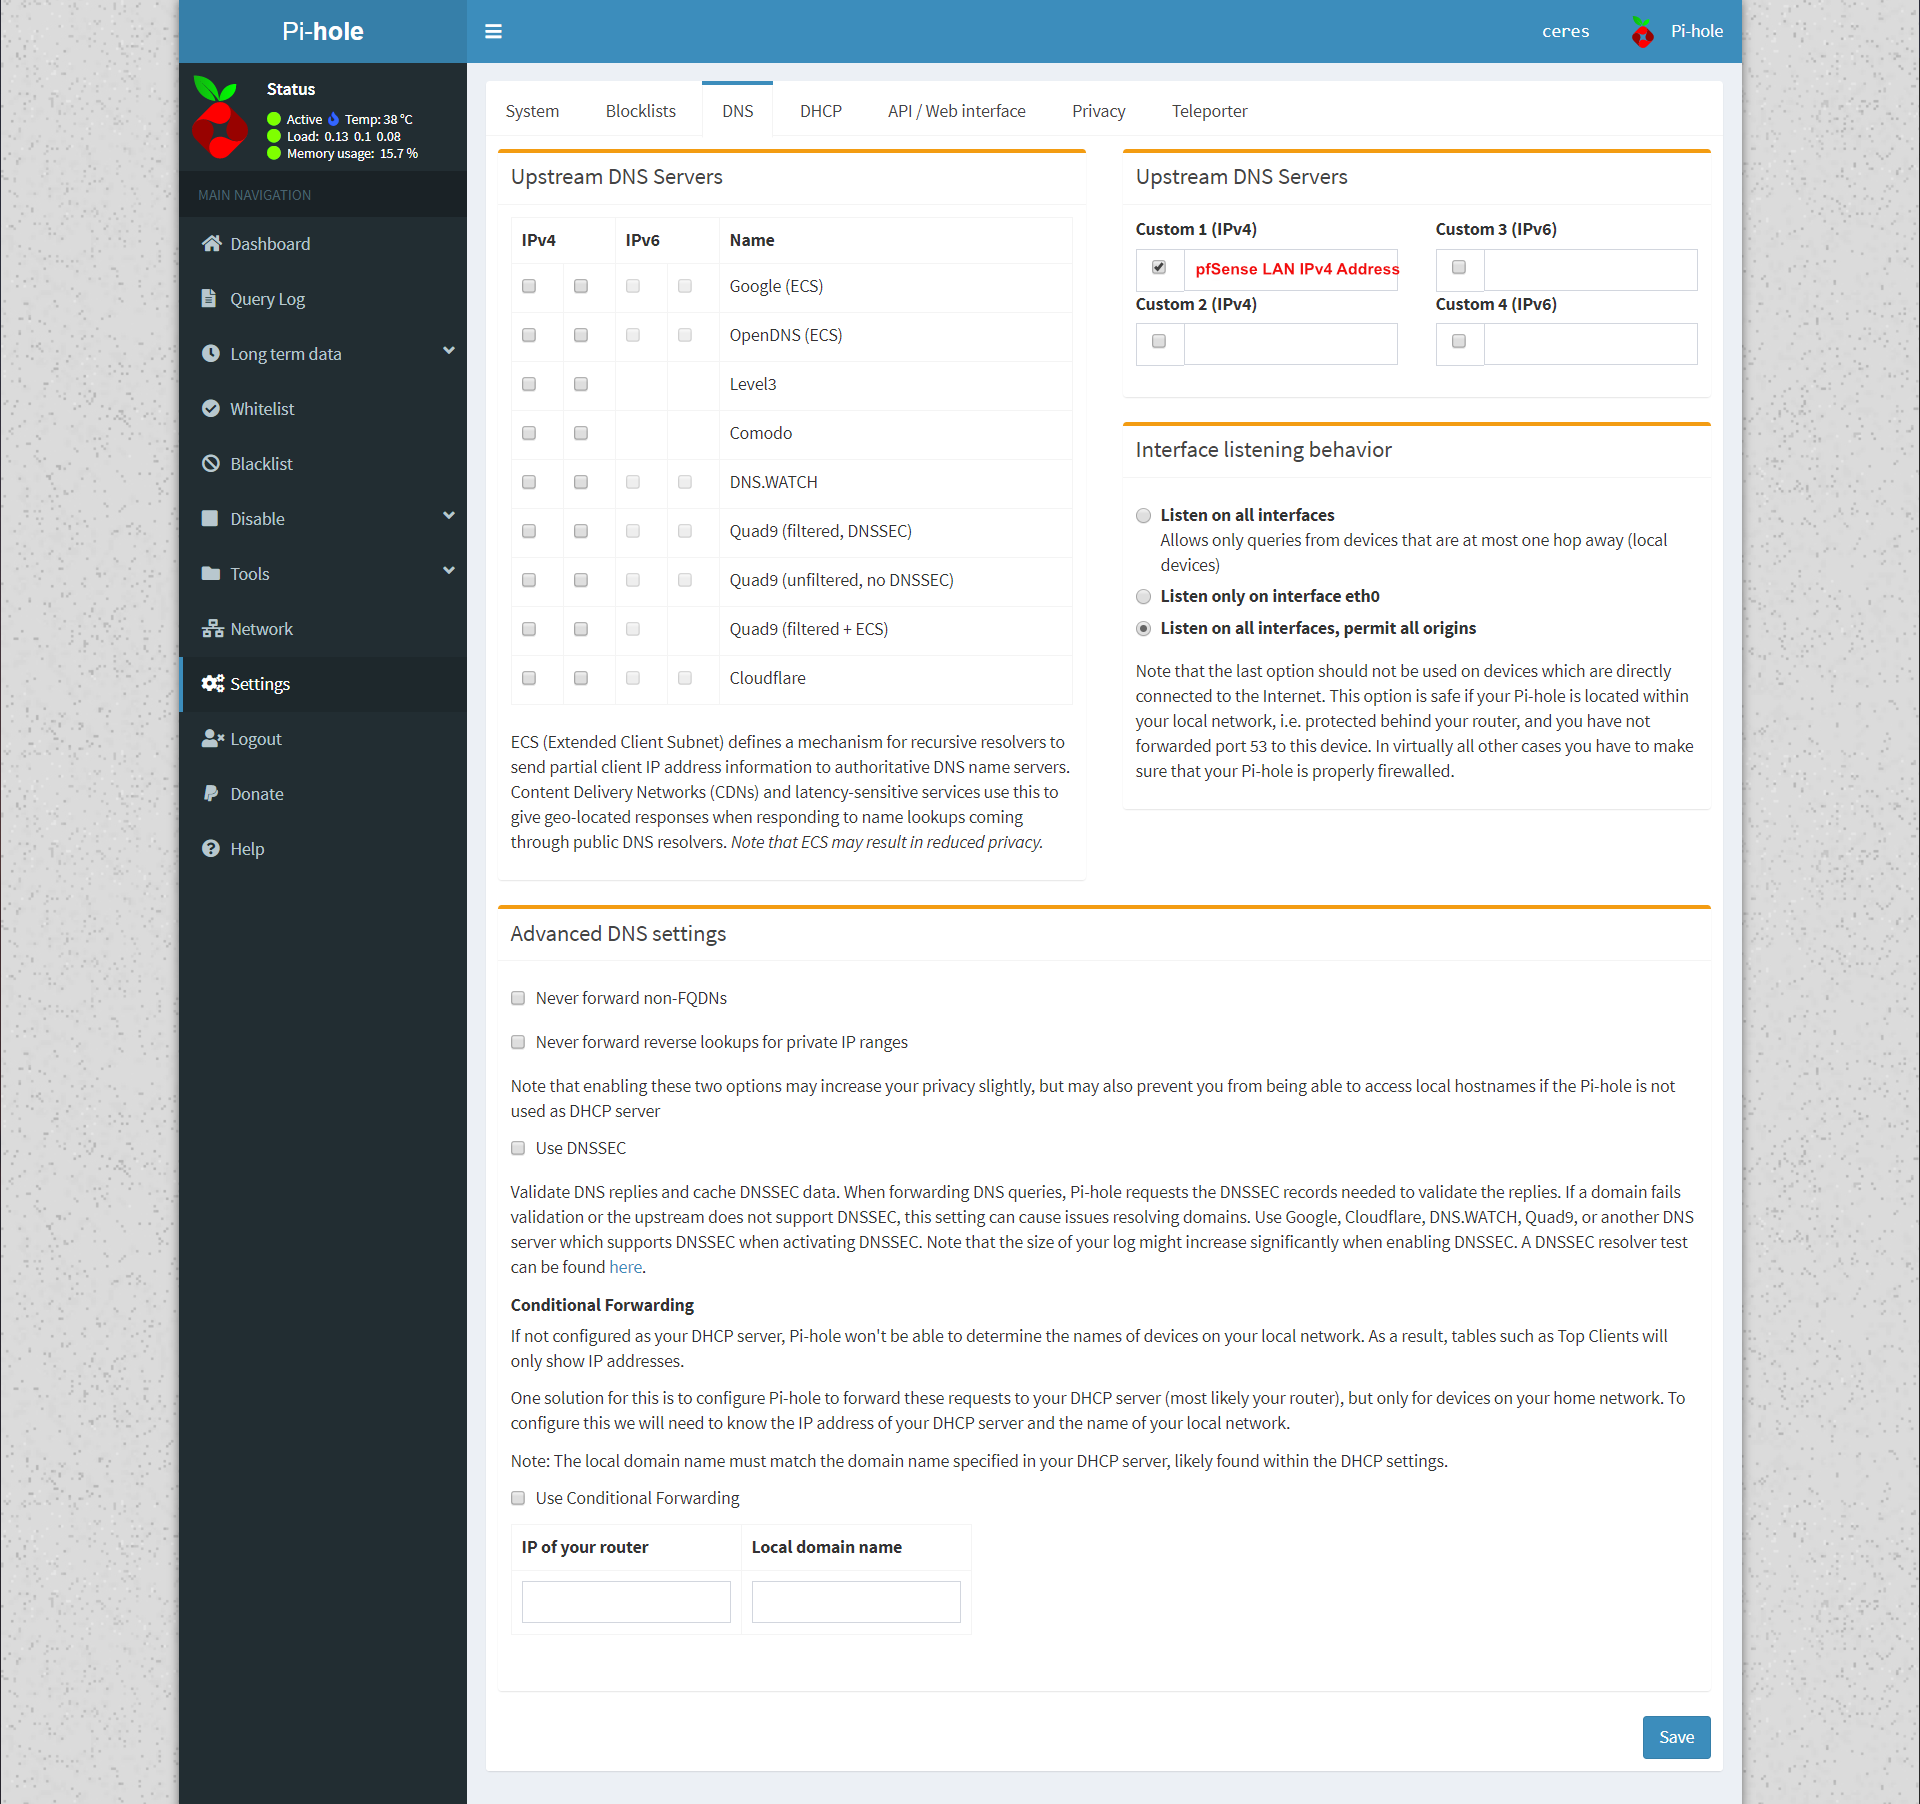
Since pfSense is configured for DHCP and I want all my local lan hosts to resolve, I setup the Pi-Hole so that the only upstream DNS server is the LAN IP of the pfSense box. pfSense's DNS Resolver service is configured DNS over TLS to CloudFlare.
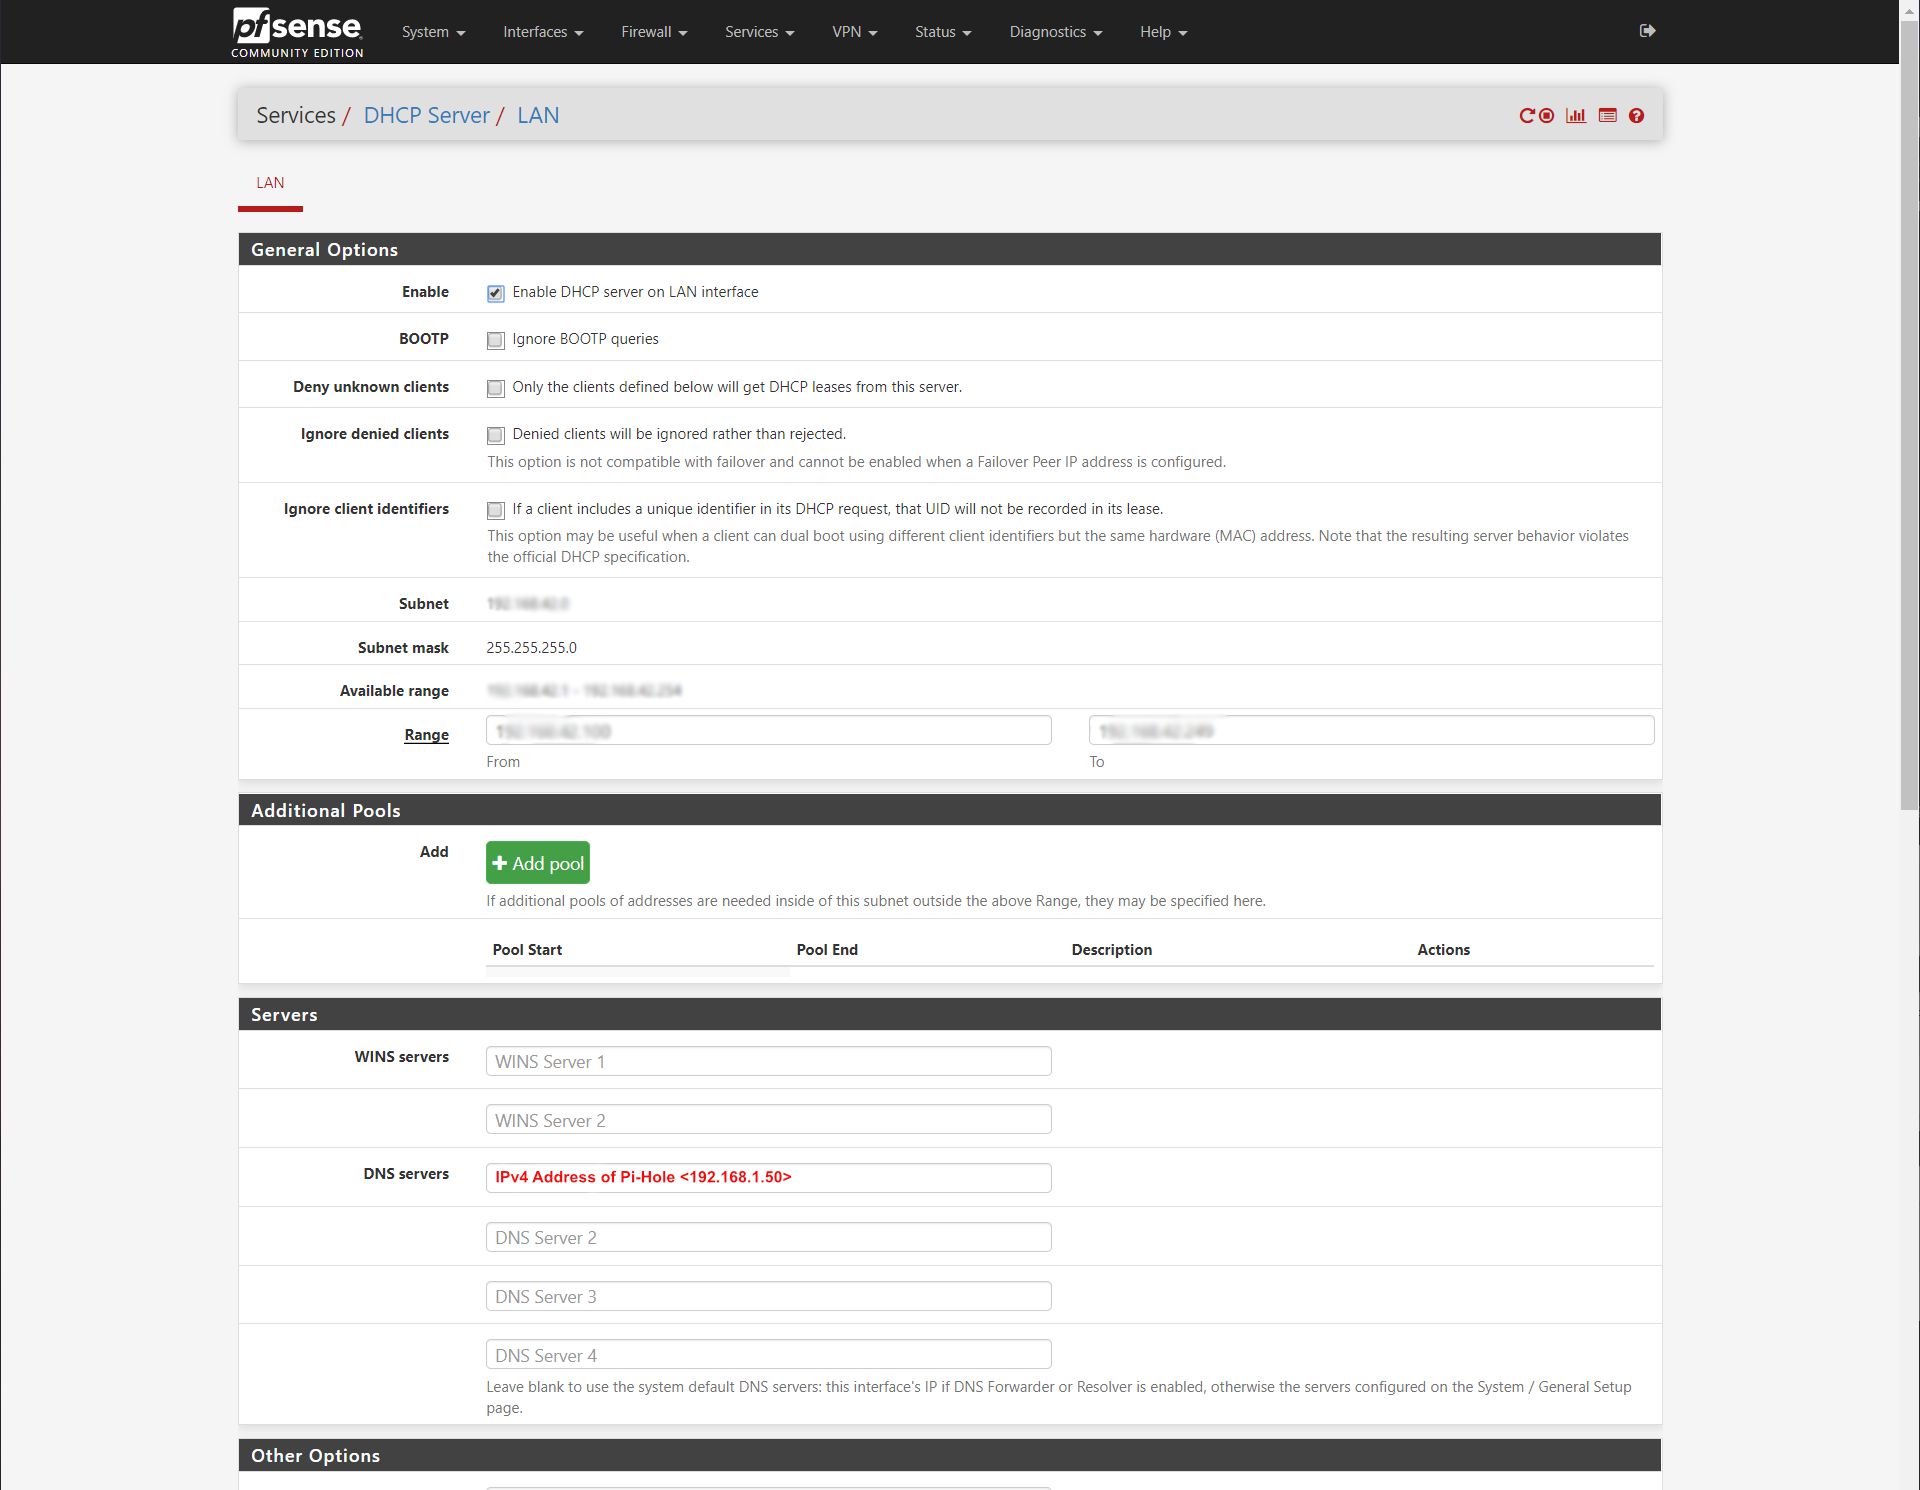
Now we configure pfSense DHCP server to use 192.168.1.50 for its DNS server.

Now we go back to the IPv6 Router Advertisement configuration and add our Pi-Hole's IPv6 address there.
Now all your DNS traffic from your LAN, both IPv4 and IPv6 should be flowing through your Pi-Hole.